Saturday 18 August 2007

Vallarai Thogayal (Chutney)

I was enjoying my vacation until last week and was happily posting recipes. Now back to square one...have put on my wings. In a day, I get hardly 12 hours to spend at home. Out of which 7-8 hours goes in sleep. In the remaining 4 hours (morning 2 hours and evening 2 hours) I get to do all other things.

I know, I could hear you saying - "So ? What are you trying to say ?"

Just a refinement in the frequency of my posts. I will be posting every Saturday. I will try my best to check my fellow bloggers posts alternate days.

Now coming to Vallarai Thogayal, I was clueless of its English Name.

Googled and found it as Gotu Kola. I am not sure how many of you would have heard the name.

The botanical name is Centella asiatica.Common names include Gotu Kola, Asiatic Pennywort, Antanan, Pegaga, Kula kud and Brahmi (although this last name is shared with Bacopa monnieri and other herbs). It is used as a medicinal herb in Ayurvedic medicine.

Source: Wikipedia

My mom prepares this often. She insists us ( I guess everyone would have been fussy when they were kids) to have it saying it is good for memory power. When I read the article in Wikipedia I learnt that there are more goodness associated with it.

Very simple thogayal. You can mix with rice or have it as side dish to dosa/idli.

Ingredients:
Vallarai Keerai - 1 Bunch
Tamarind - 1/2 of Lemon size.
Red Chilli - 4
Urad Dhal - 2 Tsp
Oil - 2 Tsp
Salt - As required


Method:

  1. Heat oil in a pan and fry red chilli, urad dhal and tamarind.
  2. Clean the Vallarai keerai, remove the steam and dry fry it until the water evaporates.
  3. Grind everything together with salt, sprinkling water inbetween.Don't add too much of water, it should be a thick paste.
  4. Store it in a container. It will last for a week if refrigerated.

Nutritional Facts:

  • Vallarai - Active Ingredients are Bacoside A and B. Bacoside A allow blood to flow more freely through the body.Bacoside B is a protein attributed to nourishing the brain cells.
  • Check out Wikipedia for more...

Award:
I have been given 'Blogging Community Involvement' Award

by TBC and Archana


The Power of Schmooze Award is for bloggers who "effortlessly weave their way in and out of the blogosphere, leaving friendly trails and smiles, happily making new friends along the way. They don't limit their visits to only the rich and successful, but spend some time to say hello to new blogs as well. They are the ones who engage others in meaningful conversations, refusing to let it end at a mere hello - all the while fostering a sense of closeness and friendship."

Thanks girls for such a nice award. I would like to dedicate this to all my fellow bloggers. I would like to Thank Asha here. She is the one who first dropped in a comment in my blog which boosted me up and kept me going. Many Thanks to all other fellow bloggers and viewers.


Have a great weekend !

Tuesday 14 August 2007

Baby Carrot Pickle

'Happy Independence Day' to all my fellow Indians.

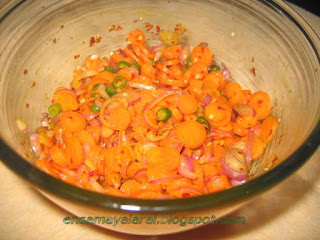
Carrots are one of my favourites. When I went for grocery shopping last week, I was attracted by these cute little baby carrots. I bought these with the intention of making salad...but then changed my mind after coming home.I made carrot pickle.Here is a simple and absolutely tasty carrot pickle. This can be had as a side dish with any kind of rice.

I am running tight with my assignments (@ work) hence my post frequency will be less until this month end [you still can check out my other recipes ;) ].

Ingredients:
Carrot - 200 gms
Small Onion - 6
Green chilli - 4
Red chilli - 2
Lemon - 1
Dates - 1/4 portion
Salt - As required
Turmeric powder - A pinch

Method:
  1. Chop carrot, onion and green chilli widthwise into small circles.
  2. Grind red chilli and dates.
  3. Mix chopped carrot, onion, green chilli and the ground paste.
  4. Add turmeric powder, salt and lemon juice to the mixture.
  5. Mix well and allow it to marinate for a week.

Update:
Few points based on the Comments received

  • Pickle should be refrigerated.
  • Shelf Life: I have not kept it for more than a month (it will be consumed).If you want to have a longer shelf life, you can use Vinegar instead of lemon.I generally don't prefer Vinegar.

Nutritional Fact:

  • Carrot - Rich in Vitamin A or betacarotene

Saturday 11 August 2007

Cabbage Thoran / Curry

Thoran is nothing but a curry prepared by Keralites using shredded coconut.

Few years ago 3 of our friends had been to a wedding in Kerala. We stayed in one of our keralite friend N's house. It was a small village and the house was in the midst of a small forest. The street was too narrow and was lined up with Jackfruit trees, Rubber trees on one side and houses on the other side. I was so thrilled and amazed to see Jackfruits hanging down to earth.

That was my first visit to a Keralite's house. There were so many dishes on the table prepared by N’s mom. We all had a special veggie day. Few things that caught my mind were Cabbage Thoran, Jackfruit chips, Papadam and Tea. I was confused seeing Tea on the table with meals. Yes, that is how it is. Anyway it had its own taste. Coming to Thoran, until I finished having it I did not know that it was made of Cabbage. It tasted heavenly. I then got the recipe from N’s mom. Whenever I prepare Cabbage thoran, I never forget to think about my friend N and her mom.

Ingredients:
Cabbage – 1 Small

To Grind:
Small Onions – 6
Garlic pods – 4
Ginger – ½“
Green Chilli – 4
Shredded Coconut – 6 Tsp
Cumin seeds / Jeera – 2 Tsp
Salt – As required

To Temper:
Red chilli – 2
Mustard seeds -1 Tsp
Curry leaves - Few
Turmeric – A pinch
Oil - 1 Tsp

Method:
  1. Grind Small onions, Garlic pods, Green chilli, Ginger, Cumin seeds and Coconut together with salt.
  2. Chop cabbage into small pieces.
  3. Heat oil in a pan. Add mustard seeds and allow it to splutter.
  4. Add red chilli, curry leaves and turmeric powder.
  5. Add the chopped cabbage and sauté for sometime ~ 10 minutes. Do not add water.
  6. Do not overcook the cabbage. Once the cabbage becomes slightly soft (not too soft), add the ground ingredients.
  7. Sauté for 5 minutes and switch off the stove.
  8. Enjoy the taste.

    Thoran can be prepared with other vegetables too like beans.

Nutritional Fact:
  • Cabbage - Rich in Vitamin C

Thursday 9 August 2007

Vijis Apricot Orange Marmalade - Peach Orange Marmalade

I did not intend to post anything today.
But then,
Viji's Apricot Orange Marmalade made me to do this.

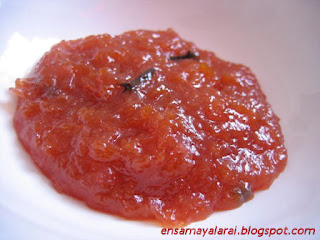
I am not a great fan of jams. For that matter, I am not a great fan of sweets. For this obvious reason, I don't try preparing jams myself. Basically you need interest to do anything isn't it. This is the first time I prepared Jam myself.I was really excited to see the output.Thanks to
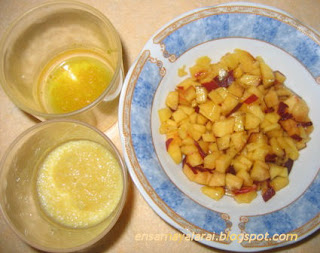
Viji . When I saw her Apricot Orange Marmalade, I couldn't resist. I wanted to try it immediately. I tried this with Peach instead of Apricot.

As this is my first attempt, I did not want to take the risk of wasting fruits.

Hence I used
Peach - 1 Large (which I had)
Orange Zest - 1/4 Tsp
Orange juice - Obtained from 1/2 Orange
Sugar - 4 Tsp
Cloves -3
Salt - A pinch.

I ran out of Lemon, so didn't use Lemon juice. ( I couldn't wait to get a lemon)

MW high - 5 mins
MW low - 10 mins

Actual recipe here

I started having it before allowing it to cool. I am going to shop apricots this weekend and prepare one.Once again Thanks to Viji.

Tuesday 7 August 2007

Varattu Upma (Dry Upma)

Varattu Upma which literally means 'Dry Upma' is our all time favourite. It's been quite a long time since I prepared it. My mom prepares it in just few minutes with excellent taste. When I read about Mallugirl's Summer Express Cooking Event, this is the one which striked my mind. And since it is made of Rice flour...this qualifies for Jihvā for Rice too ;), hosted by Sharmi and started (Jihvā for ingredients) by Indira of Mahanandi.
With just 4 basic Ingredients, this Upma tastes very good.

Ingredients:
Rice flour - 1 Cup
Tamarind - 4"
Red chilli whole - 1 No
Red chilli powder - 1/4 Tsp
Curd Chilli - 4
Salt - As required
Sesame Oil - 3 Tsp
Curry leaves - Few
Mustard seeds - 1 Tsp

Method:

  • Start: 5.30
  • Soak tamarind in water and extract the juice - 5 mins
  • Gradually add the tamarind juice to the rice flour. Add salt and check the consistency. It should be like pakoda / pakora consistency (as shown in the picture) - 3 mins
  • Heat 2 tsp of oil in a pan, splutter mustard seeds. - 2 mins
  • Add Curry leaves, Red chilli whole and Curd chilli and fry. - 1 min
  • Add the rice flour and red chilli powder. Fry for sometime by adding oil (if needed) - 3 mins
  • Upma is ready to eat. Serve hot.
  • Total Time: 14 mins

If you don't have Curd Chilli, you can replace it with Red chilli whole.

It was really exciting to have the timer nearby while cooking. I have mentioned only the time taken for the process. I have suppressed the time for my inbetween photography session.

Thanks to Mallugirl for organizing Summer Express Cooking Event and Thanks to Sharmi for hosting Jihvā for Rice. Here is my entry.

Sunday 5 August 2007

Spinach Dhal (SIMP in it)

My mom used to prepare greens at least once in a week. She picks up different varieties and makes each one in a different way. Each one has its unique taste. A lady used to deliver us greens freshly brought from a village nearby. The only difficulty is the cleaning process.

Though not weekly, I prepare Spinach at least once in month. It is everyone's favourite at home. I prefer to have the organic baby spinach. (Not much of cleaning work)

For a change I added Sprouted Moong and Viji's SIMP powder along with other usual Ingredients. It came out very well and tasted more delicious than usual. I was wondering...is it because of Sprouted Moong or Viji's SIMP ? I didn't want to conclude anything with this, so I prepared the same Spinach Dhal other time without Sprouted Moong and the result....more-delicious-than-usual again.

Thanks to Viji. I wanted to share this with you all and here it is.

Ingredients:
Spinach - 1 Bunch (or 2)
Onion - 2 Nos (Large)
Tomato - 2 Nos (Large)
Green Chilli - 4 Nos
Toor Dhal - 1 Cup
Red chilli powder - 2 Tsp
Milk - 4 Tsp (Coconut milk preferred)
Viji's SIMP - 3 Tsp
Sprouted Moong - 5 Tsp (Optional)
Turmeric powder - A pinch.
Salt - As required
Oil - 2 Tsp

To Garnish
Mustard Seeds - 1 Tsp
Curry Leaves - Few
Red Chilli - 2

Method:

  1. Clean spinach and chop nicely.
  2. Chop onion, tomato and green chilli.
  3. Cook the dhal with a pinch of Turmeric.
  4. Heat oil in a pan, fry onion and green chilli for sometime.
  5. Add the spinach, add some water and allow it to cook. (Do not close the lid. Add sprouted moong at this stage if you need)
  6. Once it is half cooked, add tomato and cook for some more time.
  7. Add the cooked dhal, red chilli powder, Viji's SIMP and salt.
  8. Adjust water accordingly and cook till the raw smell of red chilli powder disappears.
  9. Switch off the stove and add milk.
  10. Temper with Mustard, Curry leaves and Red chilli whole.

You can have it with rice or as a side dish to Chapati.

Nutritional Fact:

  • Spinach - Rich in Vitamin A and Vitamin C
  • Toor Dhal - Rich in protein, starch, fiber, iron, calcium and minerals.

Friday 3 August 2007

Vermicelli Payasam/Kheer

Today is the 18th day of the Tamil month Aadi known as 'Aadi Perukku' or 'Pathinettam perukku'.Pathinettu is a tamil word for 18 and Perukku means Rising.

'Aadi Perukku' is a festival celebrated on the 18th day of Aadi welcoming the monsoon. More about
Aadi month.
Since today is a Friday, it is considered more auspicious.

I made a quickie payasam or so called kheer this morning. There are various kinds of Payasam like Aval (poha), Rice payasam, Paruppu (dhal) payasam and lot more. I picked up this, as it is very easy and less time consuming one.

Ingredients:
Milk - 7 Cups
Vermicelli - 1 Cup
Sugar - 6 Tsps (or according to your taste)
Ghee - 2 Tsps
Cashew - 6
Almond- 6
Raisin - 12
Cardamom - 2 -3


Method:
  1. Boil the milk well. Keep the stove in low and let it keep boiling (10 mins).
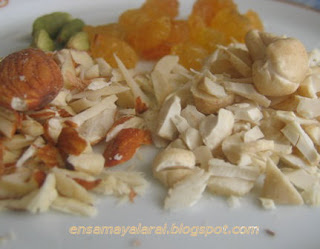
  2. In the meantime, shred or cut Cashew and Almond into small pieces.
  3. Heat 1 Tsp of ghee in a pan. Fry raisins and pieces of Cashew and Almond. Keep it aside.
  4. Heat 1 Tsp of ghee and fry vermicelli until golden brown.
  5. Add the vermicelli to the boiling milk and allow it to cook (~5 mins).
  6. Add Cardamom seeds.
  7. Now add sugar and allow it to melt.
  8. Switch off the stove and garnish with cashew, almond pieces and raisins.
  9. Payasam (Kheer) is ready to serve.

Note:

  • Add enough milk so that the payasam does not turn thick. If it turns thick, you can add warm or cold milk just before serving.